ReactiveUI と ReactiveProperty を比較してみました。
どちらも深いところまで使ってはいませんが、どちらがスッキリ書けるかの比較のつもりで。
作成するサンプルアプリケーション
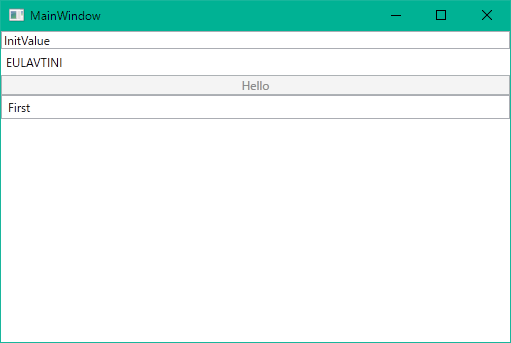
初期状態
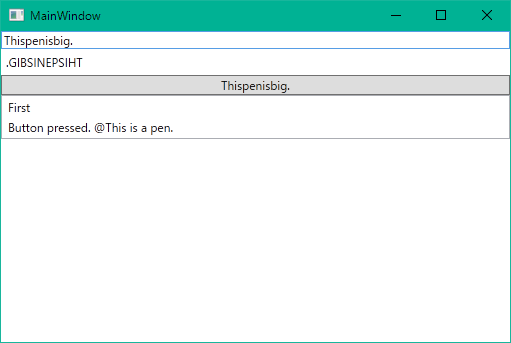
ボタンが押せる状態
一番上のテキストボックスに入力すると、すぐに下のテキストが大文字化して逆順に表示されます。Hello となっていて、もしテキストボックスに 2 秒以上変化が無ければボタンの文字がテキストボックスの内容と同じになります。また、テキストボックスが 10 字を超えていればボタンを押せるようになります。
ボタンを押すと、リストボックスに要素が追加されていきます。リストボックスには最初から First という要素が入っています。
双方のサンプルが入ったソースコード等はこちらから
ReactiveUI [ReactiveUI](http://reactiveui.net)は、 WPF や UWP の他にも、 WinForms にも対応するなどしています。幅広いプラットフォームとコミュニティの活発さを感じます。
NuGet からは `reactiveui` というパッケージを利用してください。すべて小文字なものが本物です。
ByReactiveUI/MainWindow.xaml 1 2 3 4 5 6 7 8 9 10 11 12 13 14 15 16 17 18 <Window x :Class "ByReactiveUI.MainWindow" xmlns ="http://schemas.microsoft.com/winfx/2006/xaml/presentation" xmlns: x "http://schemas.microsoft.com/winfx/2006/xaml" xmlns: d "http://schemas.microsoft.com/expression/blend/2008" xmlns: mc "http://schemas.openxmlformats.org/markup-compatibility/2006" xmlns: local "clr-namespace:ByReactiveUI" mc :Ignorable "d" Title ="MainWindow" Height ="350" Width ="525" > <Window.DataContext > <local :ReactiveUIViewModel </Window.DataContext > <StackPanel > <TextBox Text ="{Binding Path=Text, Mode=TwoWay, UpdateSourceTrigger=PropertyChanged}" /> <Label Content ="{Binding Path=LabelText.Value}" /> <Button Content ="{Binding Path=ButtonText.Value}" Command ="{Binding Path=ButtonCommand}" /> <ListView ItemsSource ="{Binding Path=LogList}" /> </StackPanel > </Window >
XAML については、何の変哲もありません。 ***.Value となっているのも、 ViewModel に get-only プロパティを作れば *** とできます。
ByReactiveUI/ReactiveUIViewModel.cs 8 9 10 11 12 13 14 15 16 17 18 19 20 21 22 23 24 25 26 27 28 29 30 31 32 33 34 35 36 37 38 39 40 class ReactiveUIViewModel : ReactiveObject { private string text = "InitValue" ; public string Text { get { return text; } set { this .RaiseAndSetIfChanged(ref text, value ); } } public ObservableAsPropertyHelper<string > LabelText { get ; } public ObservableAsPropertyHelper<string > ButtonText { get ; } public ReactiveCommand<object > ButtonCommand { get ; } public ReactiveList<string > LogList { get ; } = new ReactiveList<string > { "First" }; public ReactiveUIViewModel () { var textObservable = this .WhenAnyValue(x => x.Text); LabelText = new ObservableAsPropertyHelper<string >(textObservable.Select(x => string .Concat(x.ToUpper().Reverse())), x => this .RaisePropertyChanged(nameof (LabelText)), x => { }); ButtonText = new ObservableAsPropertyHelper<string >(textObservable.Throttle(TimeSpan.FromSeconds(2.0 )), x => this .RaisePropertyChanged(nameof (ButtonText)), "Hello" ); ButtonCommand = ReactiveCommand.Create(this .WhenAny(x => x.Text, x => x.Value.Length > 10 )); ButtonCommand.Subscribe(_ => LogList.Add($"Button pressed. @{Text} " )); } }
ViewModel はちょっと複雑で、手動で INotifyPropertyChanged を起こすメソッドを呼ばなければなりません。また、 ObservableAsPropertyHelper<T>#Value は get-only プロパティなので、 Text プロパティはこのような形でなければなりません。
ReactiveProperty [ReactiveProperty](https://github.com/runceel/ReactiveProperty)は WPF や UWP の等の XAML を使うプラットフォームに対応しています。 UniRx を開発された方をはじめ、日本の C# 界隈で活躍されている方々によって作られています。
NuGet からは `ReactiveProperty` というパッケージを利用してください。
ByReactiveProperty/MainWindow.xaml 1 2 3 4 5 6 7 8 9 10 11 12 13 14 15 16 17 18 <Window x :Class "ByReactiveProperty.MainWindow" xmlns ="http://schemas.microsoft.com/winfx/2006/xaml/presentation" xmlns: x "http://schemas.microsoft.com/winfx/2006/xaml" xmlns: d "http://schemas.microsoft.com/expression/blend/2008" xmlns: mc "http://schemas.openxmlformats.org/markup-compatibility/2006" xmlns: local "clr-namespace:ByReactiveProperty" mc :Ignorable "d" Title ="MainWindow" Height ="350" Width ="525" > <Window.DataContext > <local :ReactivePropertyViewModel </Window.DataContext > <StackPanel > <TextBox Text ="{Binding Path=Text.Value, Mode=TwoWay, UpdateSourceTrigger=PropertyChanged}" /> <Label Content ="{Binding Path=LabelText.Value}" /> <Button Content ="{Binding Path=ButtonText.Value}" Command ="{Binding Path=ButtonCommand}" /> <ListView ItemsSource ="{Binding Path=LogList}" /> </StackPanel > </Window >
XAML については、こちらも何の変哲もありません。ただし、 TwoWay でバインドした要素でも ***.Value となっています。
ByReactiveProperty/ReactivePropertyViewModel.cs 8 9 10 11 12 13 14 15 16 17 18 19 20 21 22 23 24 25 26 27 28 class ReactivePropertyViewModel { public ReactiveProperty<string > Text { get ; } = new ReactiveProperty<string >("InitValue" ); public ReactiveProperty<string > LabelText { get ; } public ReactiveProperty<string > ButtonText { get ; } public ReactiveCommand ButtonCommand { get ; } public ReactiveCollection<string > LogList { get ; } = new ReactiveCollection<string > { "First" }; public ReactivePropertyViewModel () { LabelText = Text.Select(x => string .Concat(x.ToUpper().Reverse())).ToReactiveProperty(); ButtonText = Text.Throttle(TimeSpan.FromSeconds(2.0 )).ToReactiveProperty("Hello" ); ButtonCommand = Text.Select(x => x.Length > 10 ).ToReactiveCommand(); ButtonCommand.Subscribe(_ => LogList.Add($"Button pressed. @{Text.Value} " )); } }
こちらの ViewModel はすっきりしています。 ReactiveProperty<T>#Value は get-set プロパティなので、 ReactiveUI のように setter でイベント処理を行う必要はありません。
しかし、逆に setter を使って複雑なことをしたい場合は、よくある INotifyPropertyChanged を実装してイベントを発行する必要があるので面倒かもしれません。
まとめ
ReactiveUI 途中から導入する場合でも XAML の変化が少なくできそう。 WinForms にも対応。
ReactiveProperty ViewModel がきれいに直感的に書ける。疑問が出てきても日本語で質問できる環境。
C# 6 になったことで get-only プロパティがとても簡単に書けるようになり、これらのライブラリの使いやすさも向上しています。
MVVM フレームワークと合わせてガンガン使っていきましょう。
 初期状態
初期状態
 ボタンが押せる状態
 [ReactiveUI](http://reactiveui.net)は、 WPF や UWP の他にも、 WinForms にも対応するなどしています。幅広いプラットフォームとコミュニティの活発さを感じます。
NuGet からは `reactiveui` というパッケージを利用してください。すべて小文字なものが本物です。
[ReactiveUI](http://reactiveui.net)は、 WPF や UWP の他にも、 WinForms にも対応するなどしています。幅広いプラットフォームとコミュニティの活発さを感じます。
NuGet からは `reactiveui` というパッケージを利用してください。すべて小文字なものが本物です。
 [ReactiveProperty](https://github.com/runceel/ReactiveProperty)は WPF や UWP の等の XAML を使うプラットフォームに対応しています。 UniRx を開発された方をはじめ、日本の C# 界隈で活躍されている方々によって作られています。
NuGet からは `ReactiveProperty` というパッケージを利用してください。
[ReactiveProperty](https://github.com/runceel/ReactiveProperty)は WPF や UWP の等の XAML を使うプラットフォームに対応しています。 UniRx を開発された方をはじめ、日本の C# 界隈で活躍されている方々によって作られています。
NuGet からは `ReactiveProperty` というパッケージを利用してください。